
Composite decking means boards made from wood fiber and plastic, usually with a protective cap that resists stains, fading, and moisture. Most problems with composite decks come from the frame and spacing, not the boards themselves. Follow your local building code and your brand's installation guide. Skipping details like joist spacing, blocking, or gapping rules leads to wavy boards, buckling, and failed inspections.
Quick Checklist Before You Buy Anything
- Deck size + shape + stair location
- Sun/shade + drainage plan
- Permits and HOA approval (if needed)
- Board type (grooved-edge vs square-edge)
- Fastening plan (hidden clips vs screw-and-plug vs color-matched screws)
- Substructure plan (joist spacing + blocking requirements)
Step 1 — Plan Your Layout (and handle permits/HOA)
Measure and sketch the deck
Start with door location, traffic flow, grill zone, and dining area. Plan the stair path to the yard before you frame—don't trap stairs in a corner where nobody wants them.
Sketch the basic shape and mark where posts, beams, and joists will go. This helps you order the right materials and catch problems before you dig footings.
Stafford notes
Most composite decks in Stafford County require a building permit if they're attached to the house or over 30 inches high. Plan for permit review and inspections when scheduling your build. (See our guide on deck permits in Stafford for details.)
Step 2 — Choose The Right Composite Materials
Pick your boards
Capped composite has a protective shell around the wood-plastic core. It resists fading, stains, and moisture better than uncapped composite. Most new composite products are capped.
Uncapped composite is an older technology—cheaper but fades faster and stains more easily.
Color and heat:
Dark colors (chocolate brown, espresso, charcoal) look great but get hot in full sun—surface temps over 110°F in summer. Lighter colors (tan, gray, light brown) stay cooler. If your deck sits in full sun, pick a lighter shade.
Pick your fastening system
Hidden clip system:
Grooved-edge boards use clips that snap into the grooves and attach to joists. This hides all fasteners and gives a clean look. Most clips require 16-inch on-center joist spacing (12-inch for diagonal installs).
Screw-and-plug system:
Square-edge boards get screwed down, then the screw heads are covered with color-matched plugs. Easier install, but you'll see the plugs.
Fascia boards:
Cover the rim joist with composite fascia to hide the framing and give a finished edge. Here's how to install composite decking with hidden fasteners.
Step 3 — Build The Substructure The Right Way
This is the make-or-break part. Composite boards need a solid, properly spaced frame, or they'll sag, bounce, and feel wavy.
Foundation and supports
Footings:
Dig footings below the frost line (typically 18–24 inches deep in Stafford). Use concrete piers or poured footings. Set post bases on top with anchor bolts.
Posts, beams, and hardware:
Use pressure-treated lumber for posts and beams. Attach beams to posts with rated structural connectors or post caps—don't just toe-nail them. Use hot-dipped galvanized or stainless steel hardware for all connections.
Joist spacing (composite needs tighter spacing)
Most composite boards require 16 inches on-center joist spacing for straight installations. If you're running boards diagonally, joist spacing drops to 12 inches on-center.
Check your brand's installation guide—some products have stricter requirements. Wrong joist spacing causes a bouncy, wavy deck that feels cheap.
Blocking (to keep the deck flat and reduce movement)
Blocking is cross-bracing between joists that stops twisting and keeps boards flat. Many composite manufacturers require blocking rows every 4–6 feet. TimberTech and Trex installation guides call this out specifically.
Skip blocking, and you'll get movement, uneven boards, and loose fasteners over time.
Ledger board and flashing (if attached to the house)
Attach the ledger board directly to the house band board or rim joist—not over siding. Use lag bolts or through bolts spaced per code (typically every 16 inches). Install flashing above the ledger to keep water from rotting the house framing.
This is not a shortcut area. A failed ledger board is one of the most dangerous deck problems, as it can cause collapse.
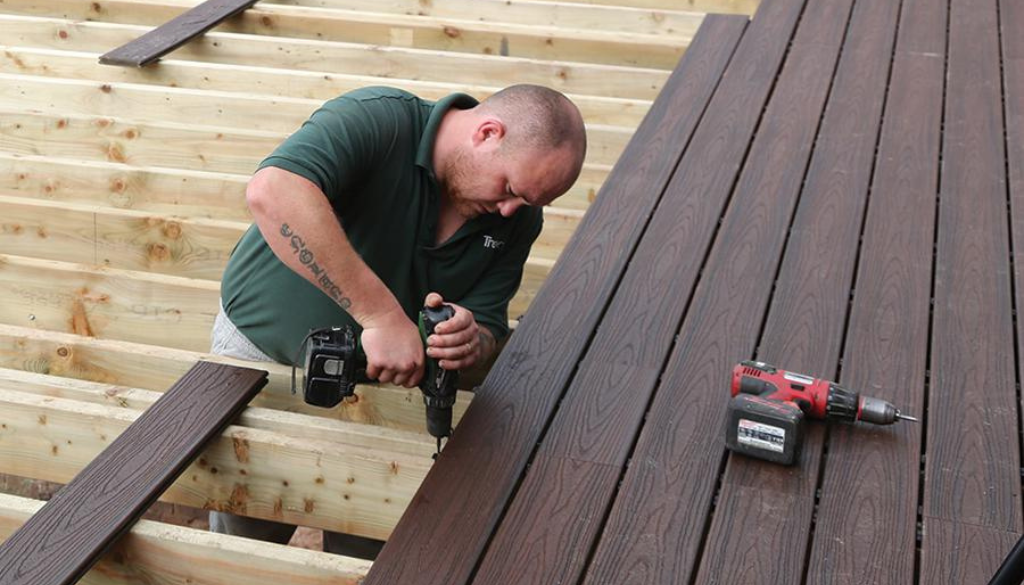
Step 4 — Install Composite Deck Boards
Set the first board straight (everything follows it)
Snap a chalk line parallel to the house and align the first board to it. If the first board is crooked, every board after it will be off. Work from the house out toward the yard, checking alignment every few boards.
Gapping rules (read your brand's chart)
Composite boards expand and contract with temperature changes. You need gaps for drainage and movement.
Width-to-width gaps (side-to-side):
Most brands require a minimum 3/16-inch gap between boards. Some manufacturers call for larger gaps depending on installation temperature.
End-to-end gaps:
Where the board ends meet, leave a gap based on installation temperature. Trex's guide shows gap sizes ranging from 1/4 inch in hot weather to 3/8 inch or more in cold weather.
Wall or solid object gaps:
Leave 1/4 inch to 1/2 inch where boards meet a wall, post, or solid surface.
Check your brand's gapping chart before you start. Wrong gaps lead to buckling in summer or ugly, wide gaps in winter.
Fastening options
Hidden clips:
Slide the clip into the board groove, center it on the joist, and screw it down. Keep tension consistent—overtightening cracks boards, under-tightening lets them move.
Screw-and-plug:
Pre-drill holes if required by the manufacturer. Drive screws flush (not countersunk). Snap color-matched plugs into place.
Clean edges and layout details
Picture frame border:
Run border boards perpendicular to the field boards for a finished look. This adds cutting and blocking but looks professional.
Breaker board:
On large decks, add a contrasting board across the middle to break up long runs and hide end-to-end joints.
Step 5 — Fascia, Stairs, And Railings
Fascia and trim
Cover the rim joist with composite fascia boards. Miter corners for a clean look. Use construction adhesive and stainless screws to attach fascia—it's visible, so do it right.
Stairs (don't guess)
Stair stringer spacing:
Most composite tread material requires stringers 12 inches on-center or closer. Check your brand's specs.
Consistent rise and run:
Calculate total rise (deck height to ground) and divide by consistent riser heights (usually 7–8 inches). All steps must be within 3/8 inch of each other, or you'll create a trip hazard.
Add landings where stairs turn or where the run is too long. Anchor stair stringers securely to the deck frame.
Railings
Install guardrail posts through-bolted to the rim joist with blocking behind them for strength. Surface-mounted post brackets aren't strong enough for code.
Attach balusters, handrails, and top rails per the manufacturer's instructions. Do a final shake test—no wobble, no movement.
Step 6 — Final Checks + Maintenance Basics
Walk the deck:
Check for bounce, sway, or uneven spots. A properly framed composite deck should feel solid.
Recheck fasteners and clips:
Make sure all hidden clips are tight, and all screws are flush.
Quick cleaning routine:
Rinse the deck a few times a year to clear pollen, dirt, and mildew. Use a cleaner made for composite if you've got stuck-on grime. Don't use metal brushes or high-pressure spray up close—it damages the cap. Learn composite deck maintenance tips.
Common Composite Deck Mistakes (and how to avoid them)
Joists too wide apart:
Causes a wavy, bouncy feel. Stick to 16 inches on-center for straight runs, 12 inches for diagonal.
Ignoring gapping charts:
Leads to buckling in summer or ugly, wide gaps in winter. Follow your brand's temperature-based gapping guide.
Skipping blocking:
Causes movement, twisting joists, and uneven boards. Install blocking every 4–6 feet.
Wrong fasteners:
Regular screws corrode with treated lumber and stain composite boards. Use hot-dipped galvanized or stainless steel fasteners.
No airflow under the deck:
Traps moisture and grows mildew. Leave space for ventilation—don't close off the underside with solid skirting.
Wrap-up
If you want a composite deck that feels solid and lasts, the frame and spacing matter most. Follow joist spacing rules, install blocking, use proper gapping, and don't skip details like ledger flashing or post bases. Composite boards are forgiving, but bad framing isn't.
Planning a composite deck build?
Send us photos of your yard (sun and shade spots), rough deck size, and what features you want. We'll help you plan the layout and get it built right. Call Arca Construction at (540) 413-4860 or request a free quote online. We serve Stafford, Fredericksburg, and Spotsylvania with composite deck builds that pass inspection the first time.